You don't need an expensive stereo camera to make stereograms. Just one cheap camera is sufficient. The object is to make 2 photographs of the same scene from 2 different points. If those 2 points are separated as your eyes are (65 mm or so) then you will have so called 'normal' or 'natural' stereo base. Not always the natural stereo base is optimal. For more distant objects you'd need to make a larger lens separation, and resulting photo will be in hyper-stereo. Very close objects (macro format) require a smaller stereo base, called hypo-stereo. Also, you need to keep in mind the presentation method you are going to use. Large stereograms look better if the separation is small, because the eyes will fuse the two images more easily. Small images on the other hand look quite flat if the stereo base is small. We naturally cross our eyes when looking at very close objects. In this case the left and the right eye see very different views form very different angles. Our brain must "flatten" those hypered images so that we perceive them more naturally. Therefore, stereograms made for the cross-eye display should also be a little "hypered" in order to compensate for this type of brain processing to perceive the views seemingly in a standard depth. Not always the standard depth is the best choice. Viewing landscapes in extreme hyper reveal more spatial details than we can normally see and may be very pleasing & refreshing.
Once you've made the 2 shots, you need to crop and align them in order to make a good looking stereogram. You can make this process automatic using a specialized 3D software. Several applications are available on internet. The only free software that works on Windows and Macintosh is AnaBuilder, but most commonly known is also free Stereo Photo Maker (SPM). SPM works on Windows and is the most versatile software to prepare stereo pairs and anaglyphs of various kinds. SPM automatically aligns the two photos and makes stereograms. Note: if your two photos are different in exposure or in colors, SPM does not so good job with correcting the images, so before assembling your pictures with it, use some other photo editing applications. Among the free ones there is IrfanView.
If you want to make your stereo views manually, here's the protocol.To make a 3d photo that will be viewed on your computer you need a software that handles digital images. Adobe Photoshop or Photoshop Elements are the two that come to mind first. Here are 10 basic steps to manually prepare a stereo view.
1. Open the 2 image files with the software mentioned above
2. Move one image onto another as a separate layer
3. Make the top layer semi-transparent
4. Find one easily visible object on the left and one on the right on both images, preferably on the same vertical level (horizon is a good one)
5. Align the left objects
6. Rotate the top layer so that the right objects are on the same vertical level
7. Align the closest object on the photo, so they exactly overlap (for more information on window positioning please download this pdf file)
8. Using the crop tool select the desired part of the image and crop it
9. Make the top layer non-transparent and
10. Move it to the right or left, depending on the desired format, and "Reveal All".
This is a very basic procedure. You may add a frame to it, especially the space between the chips, as it enhances the viewing quality.
Currently available stereo systems on the market
To make 3d photos of moving objects the cha-cha method doesn't work, and you need to have a specialized camera, cameras or at least a lens. The least expensive option, provided you've got a single lens reflex (SLR) camera is Lens in a Cap (LIAC). It is a 3D lens that can be mounted on such a standard 35mm film or a digital, small frame, camera (2 types). The quality of those lenses, especially for full frame cameras, is not so great, so if you buy one, test it quickly so that you'd have the time to return it in case the quality is not up to your expectations. There are several models of specialized 35mm film stereo cameras, among them the best known is Realist. In the fall of 2009 the first digital stereo camera appeared on the market. It was Fuji FinePix REAL 3D W1. Consumer's interest was too low to keep it alive.
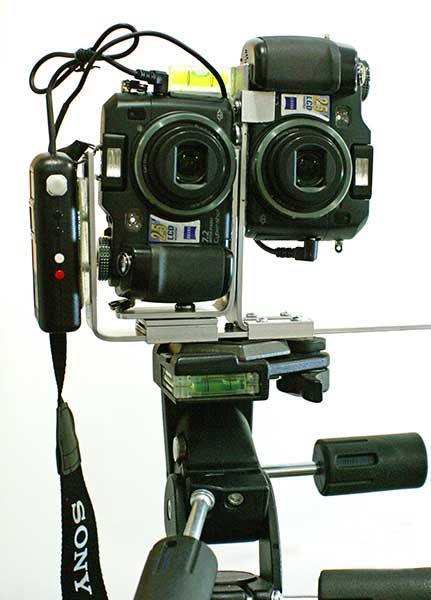
You may find specialized slide bars and other rigs that synchronize 2 cameras or split one lens image (the latter one is very useful for macro). A device that made 2 SONY cameras synchronized (LANC Shepherd) opened a possibility of building a home-made stereo system (see photos below). A newer rig that gives much better synchronization is a system made of 2 point-and-shoot Canon cameras coupled together with USB ports and using StereoData Maker. This design is most versatile (provides for variable base, gives better quality than Fuji W1, and is about twice less expensive), but a down side of it is an awkward-looking photo gear, usually much larger than Fuji W1.
 |
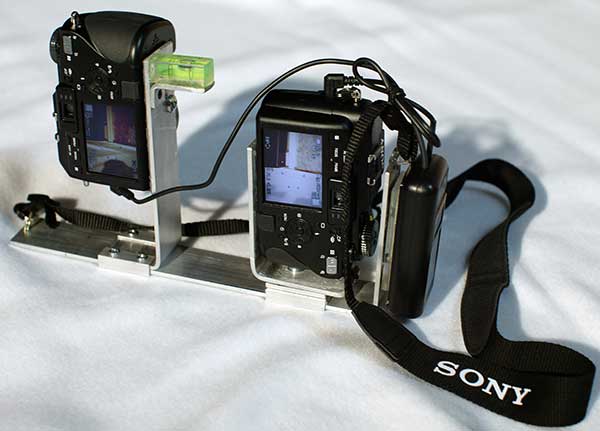 |
The photo above shows twinned SONY DSC-V3. The system on the left is mounted to a Bogen tripod head. It provides for a variable, 1-3x normal stereo base (cameras easily slide on the bar with no screws involved), and to maximize the width of a stereogram the camera on the right may be rotated (should be done with caution to minimize keystoning). This is especially important if the cameras are positioned vertically. I consider this flexibility essential. Digi-dat, a German retailer sells a larger rig and more sophisticated LANC controller, with similar functionality (only without the dedicated rotating option).
